If you are interested in learning How to Build a Website from Scratch step-by-step, this WordPress guide for beginners will help you.
Currently, the demand for using websites is great. However, only some have enough knowledge to create a website from scratch which they can run and make money. As well as to hire a website is also quite expensive for newcomers from 3 to 10 million.
Some people choose to design simple websites with a website builders and editor like Wix which is done with a couple of steps, but such platforms have very limited features.
Understanding that, I have built this online tutorial to make websites from scratch using WordPress for beginners have no technical skills and need specific programming knowledge.
Before you buy anything, please read this WordPress guide for beginners to learn How to Build a Website from Scratch step-by-step with a good design carefully:
⏩ Step 1 of How to Build a Website from Scratch step-by-step: Decide the platform
WordPress is an open-source software (Open-Source Software) written in PHP website programming language and using MySQL database management system; It is also the most popular website programming language today. WordPress is also considered the most popular CMS today to create personal blogs, news websites, tmdt,…
That is the concept of WordPress . This is a tool to help us create a website with a good design and content without touching the code or without much programming knowledge.
Why choose WordPress for building a website from scratch and not something else?
- WordPress has been very popular because of its ease of use and customization.
- No need to know too much about coding or even knowing about coding can make a website (of course, if you know to code, it’s better :D)
- You can do many types of websites.
- It allows you to customize your website easily with the help of a website builder like Elementor.
How to build a website from scratch step-by-step? Choose a good platform like WordPress and choose a website builder like Elementor.
⏩ Step 2 of How to Build a Website from Scratch step-by-step: Choose a web hosting
After you select a domain, we have to choose a hosting. But, what is a hosting?Hosting, also known as Web hosting, is a shared hosting space chopped from a server, that helps you host a website or publish an application to run on the internet. It is an essential step for building your website from scratch.
In this case, you will leave the WordPress CMS on the server to be able to run your website.
On the other hand, we have Cloud VPS. It is an acronym for Cloud Virtual Private Server, a virtualized server service set up based on cloud computing technology to meet the needs of business objects, with full administration rights server. It replaces your host for building your website from scratch.
There have been many big technology companies in the world that have adopted this technology. The ultimate goal is to provide server infrastructure and can accommodate large to extremely large systems, which can be named companies such as IBM, EMC, HP, GOOGLE, AMAZON, …
What is the difference between to choose a hosting and VPS to build your website from scratch?
- With hosting, your website is placed on the same server, sharing the resources of that server such as RAM, CPU, …
- VPS is divided into 1 server, which you can access deep into your VPS storage space, and of course, VPS will have higher stability than normal hosting.
When to use hosting and when to use VPS to build your website from scratch?
So, the question is when to use hosting to build your website from scratch and when you use VPS.
- When you are just starting from scratch as a beginner, you should use a hosting.
Sometime after the website has had traffic, you should switch to VPS for better health and optimization.
If you have a lot of money, use VPS for pleasure. My websites are 100% running on Hostinger hosting. It is great hosting hether you are an expert or starting from scratch.
Best hosting providers to build your website from scratch:
To choose a hosting provider, I recommend 3 reputable hosting providers for building your website fom scratch:
- BlueHost hosting (Read Bluehost review)
- Hostinger hosting (Read Hostinger review)
- Hostgator hosting (Read Hostinger review)
A few important factors in choosing a service provider in general and hosting, in particular, are transparency in pricing, flexible support, a friendly dashboard, and good speed. The above hostings have all these options, choose one of them.
Choose a hosting and Get the best Bluehost discount here▶ Visit BlueHost
Best VPS provider to build your website from scratch step-by-step easily:
Similarly, there are also some VPS providers I recommend, such as
- Vultr
- Digital Ocean
How to build a website from scratch step-by-step? Choose a web hosting like Bluehost or a VPS like Vutlr.
⏩ Step 3 of How to Build a Website from Scratch step-by-step: Choose a domain provider to register a domain
The domain name is the identifier name of a website operating on the internet. It is like a physical address to lead customers to your website. If you need to find a way, you need a street name and house number, and so does your website. It uses a domain to be able to lead people.
Domain names are essential for every website, so choose a domain wisely because it is the name of your brand..
For example, Makemoneytactic.com, Tabbeebak.com, Facebook.com, and Google.com are domain names for accessing a website. Choose a domain that represent your business then purchase it to start building your website.
Reputable domain registrar to choose a domain and build your website from scratch step-by-step easily:
The best domain is not just the cheapest one but the short, memorable one that can get a code to switch service providers when needed. Here are some of the popular domain providers to choose a domain:
- Namecheap.com ( I bought my domain from NameCheap for my website)
- Goddady.com
Choose a domain that represent your niche. This will help you in building your website from scratch and ranking.
✅ Learn how to register a domain name on Namecheap to choose a domain for building your website from scratch.
How to build your own website from scratch step-by-step? Choose a domain name from NameCheap.
⏩ Step 4 of How to Build a Website from Scratch step-by-step: Point the domain to Cloudflare

Cloudflare is an intermediary DNS service that coordinates traffic between servers and clients through the Cloudflare protection layer.
In other words, after pointing your domain to cloudflare, you will access it through Cloudflare, instead of accessing your website directly.
Why should point the domain to Cloudflare for building your website from scratch?
Pointing your domain to Cloudflare for building your website from scratch has many benefits like:
- Helps your website run much faster because Cloudflare’s server system is spread across many locations.
- Makes your website more secure by Cloudflare’s system.
- Allows you to save quite a bit of bandwidth by not directly accessing your hosting but taking it from Cloudflare’s cache.
- Helps you manage all your domains in one place, no matter which registrar you buy from.
Furthermore, if you need to update DNS, it only takes a few seconds, but when updating at a domain name provider, it usually takes quite a while. Once you understand the benefits of pointing your domain to Cloudflare, then proceed to register to use it.
How to register to use Cloudflare and point your domain?
- Sign in or sign up for Cloudflare on cloudflare.com.
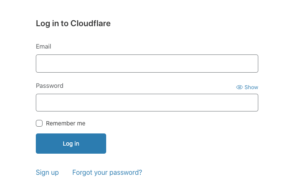
- Select Sign Up.
- Enter your email and password.
- Click Create Account.
- Confirm the email.
- Log in to Cloudflare.

- Click add site and proceed to add the domain name you just registered in the previous post here
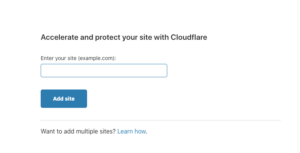
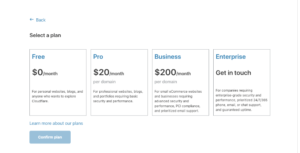
- Choose a service pack. The free plan is enough.
- Wait for the DNS scan and View it.
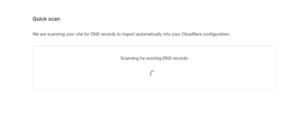
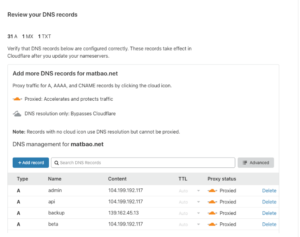
- In this step, you will check if the DNS is full. Usually, ignore it. Just keep pressing
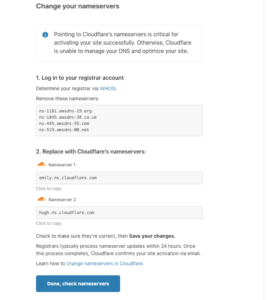
- After adding, you will see these 2 nameservers
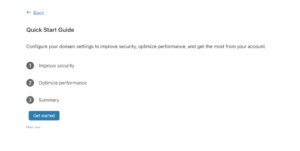

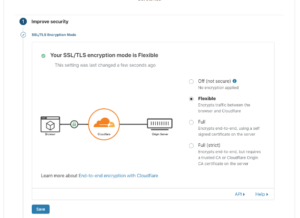
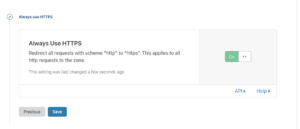
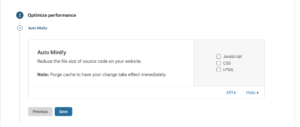
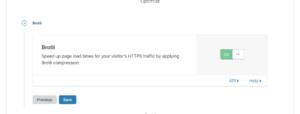

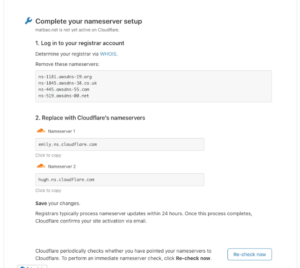
Just follow the picture to point your domain to cloudflare, and you’ll be fine.
- Please go back to the domain registration page you registered at your hosting, so go to the admin page of tiny host. If you register elsewhere, do the same.
- After you have logged in, go to the domain name section.
- Select the … and select manage nameservers
- Then click on nameservers.
- Please fill in the 2 values earlier in Cloudflare in Nameserver 1 and Nameserver 2, then click change Nameservers and wait for Cloudflare to update and send you a successful activation confirmation email.
- Usually, it will take 15 minutes to 24 hours to activate. Please wait patiently.
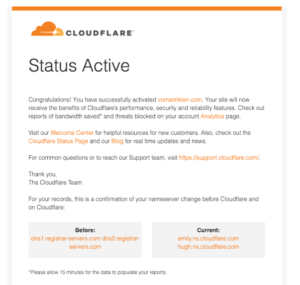
- Once you have received an email announcing Cloudflare’s domain activation like this, you have already pointed the domain to Cloudflare.
- Try accessing Cloudflare.com and see how it goes. Your domain is here.
How to build a website from scratch step-by-step? Point you domain to Cloudflare.
⏩ Step 5 of How to Build a Website from Scratch step-by-step: Configure hosting and install WordPress
After your hosting has been activated, go to the hosting management section to install your WordPress.
Here, you can see all your hosting information.
- You can create a domain email to make it more professional, e.g., email: contact@domain.com.
- You look to the right and see the log-in to the cPanel section. Please click on it.
This is your hosting management section where you should pay attention to when building your website from scratch.
- All information is available here.
- To install WordPress, scroll down to the bottom of the Scripts section and select WordPress and select Install Now.
- You scroll down to the Admin Account section.
- Admin Username is the login name to your website. You can change it to whatever you want.
- Admin Password is the password. Remember to change it.
- Admin Email you can change or leave it.
- Done and then choose the language for the website.
- Scroll down to the bottom and select Install.
- Come here and wait for it to finish installing.
- Once installed, you can go to your website.
- If you want to customize your website, go to the Administrative URL section or follow the path domain/wp-admin/
How to build a website from scratch step-by-step? Configure hosting and install WordPress to create your website from scratch.
⏩ Step 6 of How to Build a Website from Scratch: Install the interface and basic operations on the website
After successfully installing WordPress and logging in to the management section at domain/wp-admin/, let’s explore for a while. Now, we started the funny work in building your website from scratch.
- After you have explored 1 round, please visit the Settings section.
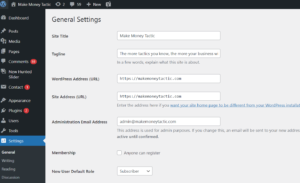
- Here you will do some basic settings for your website.
- Please edit the website name here. I will name it “Make Money Tactic.”
- Leave the links as it is.
- Followed by your website’s tagline, I will write ‘The more tactics you know, the more your business will grow’
- If you want other people to be able to sign up for an account, click on it
- The time zone you leave is UTC+7, or in which country your website operates, set the time according to that time zone.
- Set the date format and the time format as your country.
- When you’re done, click Save Changes.
Next, you go to the Permalink section. Choose the best format you like for the link of your article and click save.
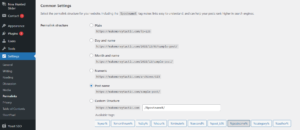
- The purpose of this is to make the URL look better and also optimize SEO.
Next comes the interface settings for your website. You can choose from free or paid themes. It’s up to you.
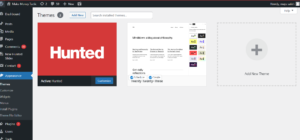
- To install a theme for your website, go to Appearance.
Please note you should delete unused themes. Just leave 1 main theme and 1 sub-theme in case of errors, or you need to update the theme manually, then change the theme.
- You click Add New to add a theme to find and select a template
In this section, there will be 2 options for you,
-
- 1 is to download the theme from your computer
- 2 is to find available and free themes on the WordPress theme repository
To upload a theme:
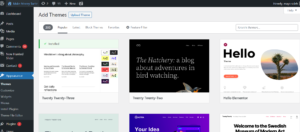
Click on upload theme, then select the theme file from your computer. Note that the theme needs to be zipped before you upload it.
- Wait for the upload to finish, then click on activate the theme.
To use an available theme:
- Enter a theme or theme name in the search box, and choose a theme you like.
A small note is that most of the free themes still need a demo installation part. When the theme is installed, you will not have a beautiful interface like the demo you have to create yourself. Sometimes it works differently than people do.
After installing the theme, follow the manufacturer’s instructions. Read the user manual carefully before using it.
- After installing the theme, go to verify, and then you can use it.
- After verifying, continue to go to Install Demos here. You can choose the templates they have already made. Just import and edit a little bit.
- Here is a live demo you can click to watch directly. Other themes have similar design, so you follow them.
- If you like it, please import it.
- Click Import on this screen and pay attention to the Required Plugins section.
- Go back to the Install Plugin section and select the plugin that the theme requires.
- Click install to install that plugin.
- After the installation is complete, click back and click Activate.
- OK, that’s it. Now, back to the import demo.
- Click demo and click Import. Wait a few minutes for the data to be imported.
- So the import has been successful. Can you turn on the website to see if the interface has any errors?
- Looks pretty professional.
- Now edit it with your favorite edits.
How to build a website from scratch step-by-step? Install the interface and basic operations on the website.
Searching for How to Build a Website from Scratch step-by-step and Struggling to create your own website? Contact our website builder to build your website for free!
Email us on MakeMoneyTactic@gmail.com and ask for Makmoneytactic Golden deal.
⏩ Step 7 of How to Build a Website from Scratch step-by-step: Manage categories and articles
First, visit the posts section. Here you will find the content you will create. Focus on creating valuable content about your business.
- You can click to see the posts/ articles/ content.
- To manage your posts/articles more effectively, you should divide them into categories. Each category is a topic.
For example, the WordPress column specializes in writing about WordPress-related issues and the MMO category specializes in MMO.
At first, you only need a few categories to do because the content is small.
To create a category:
- Go to the category section and enter the category name.
- For example, in WordPress, the string for the path can be left blank so that it automatically gets the title.
- Select the parent category not selected
- The description can be written in. You can edit it later.
- Then click add the category.
- To use the category, click on add new post, and you will create a new post.
- Add post title and content.
- Next is to select the category section.
- Find the category you just created.
- Then publish the article, and you’re done.
- You can see the article to see how the category is displayed.
- As for the Tags, you need to fill in the article’s keywords.
- The way to create a Tag is similar to a category.
As a main step for building your website from scratch beside the design, you need to optimize your content. As for article optimization, there are a lot related to SEO to help you create good articles from scratch like SEO basics, On-page SEO, Off-page SEO and more, you can read them on the SEO section on my website Makemoneytactic. They will help you write good content for building your website from scratch step-by-step easily.
How to Build a Website from Scratch step-by-step: Manage categories and articles.
⏩ Step 8 of How to Build a Website from Scratch step-by-step: Site Management
Manage posts and pages is important to build your website from scratch step-by-step easily. Let me explain the difference:
What is a page? Why have pages when there are posts?
Pages are like posts with titles, content, avatars, comments, etc.- Categories and tags do not categorize pages.
- Pages can’t appear on the timeline like posts.
Usually, when you create fixed, little changed pages such as contact, about, etc.
- To create a page, you can go to Pages and Add New Page.
- You can also do the same as creating an article.
- Here I will create a contact page.
- You can also manage the page when you add, edit, and delete pages in the All Pages section.
A website cannot be complete without a menu, right? That’s why I will explain it in this building website from scratch guide.
- You can see it on the demo page I installed in the previous videos. If you haven’t seen it, you can watch it again.
- The menu bar is available here.
- You need to go to the Appearance section, then the Menu section.
- Here you can manage all the menus on the website.
- First, delete the demo menu, scroll to the bottom, and press Delete Menu.
- Please delete all 3 4 menus.
- After that, you create a new menu by entering the menu name in the Menu Name box and clicking Create menu.
In the Menu Settings section, you can choose the display position of this menu.
- Secondary Nav Menu: This section will usually appear above the main menu below the main menu, depending on the specified theme.
- Main Nav Menu: this is the main menu of the website.
- 404 Page menu: you will see displayed on the 404 page as the page when you enter the wrong path, or the hidden page is deleted.
- Footer navigation: this is easy. It will show at the bottom of the page.
- Then now, I will choose the top 3 for this menu, and the footer will make a separate menu.
- You will see an option to add static pages automatically: if you choose this, it will automatically add your newly created pages to the menu. I do not recommend this.
Now a website needs to display what items are on the menu.
First, you have to add the homepage, the article category page, the about page, the contact page, and the blog page.
This depends on what you want to display.
You can choose the self-created link to create the homepage.
- URL: you type your site’s URL in.
- Adjust path name to Home or Home.
- Press adds to menu.
- Add a category to the menu.
- Add contact and about page too.
- Click the save menu again.
- Go to the homepage and see how it looks.
⏩ Step 10 of How to Build a Website from Scratch step-by-step: Manage comments
A website is indispensable for member comments. So, to build your website from scratch, you should manage comments to avoid any spamming.
But how to manage comments effectively and not be bothered by spam comments?
To manage comments from scratch:
- Go to Settings, then Discussions.
Here you will see a lot of options here:
- Turn off the first 2 options.
- Scroll down before the response is posted.
- Select the comment option to wait for moderation.
- Scroll down to the bottom.
- Choose whether to show your avatar or not and select your avatar when the user comments without an account.
How to Build a Website from Scratch step-by-step? Manage comments.
⏩ Step 11 of How to Build a Website from Scratch step-by-step: Manage member
Here, you can:
- Choose whether to let everyone sign up.
- Choose what role the user will have when registering on the website.
Next, to manage users:
- Go to the members’ section to manage all members on your website.
- To edit, click on a member.
- Change the information for each person or your data accordingly.
- If you want to update your avatar, change it on gavatar – a website under the WordPress system.
For WordPress, you can solve everything with plugins and widgets from scratch.
How to Build a Website from Scratch step-by-step? Keep your eyes on the members.
⏩ Step 12 of How to Build a Website from Scratch step-by-step: Widget configuration
So, what are the widgets? Are they essential to build your website from scratch step-by-step easily?
First, go to the Appearance section and choose widgets. Here you can manage all the widgets on the website.
Depending on the theme, there will be different widget positions.
As you can see, there are 3 widget positions here: the sidebar, the bottom of page 1, and the bottom of page 2.
You go to the homepage, and you will see. Try changing the widgets to see how they will change.
There are a lot of widgets here, so I need help explaining each one. If you want to learn how to use it in detail, see the article.
Now in the sidebar, I want to show the latest 5 posts so that I will choose the new post widget.
- Drag and drop to the sidebar, edit the title name and click save changes.
- Go to the homepage to see how it is. It’s already there.
Or
- Click on the widget, choose the location to add, and click Add.
⏩ Step 13 of How to build your website from scratch step-by-step: Install required plugins
First, to build your website from scratch, install needed plugins. There are plugins for everything like SEO, design, website builder, creating widgets, etc…They are very helpful especially for a beginner.
Go to the Plugins section where you can manage the installed plugins and determine the needed ones.
- Click install new.
For a new website, you need the following plugins:
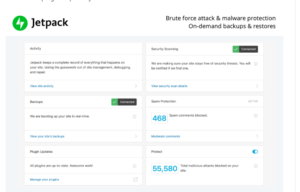
- Jetpack by WordPress.com: this plugin is developed by the company that owns the WordPress platform and has more than 5 million activations. It is used for better website security and other uses.
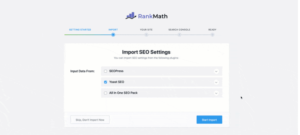
- Next is the WordPress SEO Plugin plugin – Rank Math: This plugin is used to optimize SEO for the website. You can replace it with Yoast SEO.
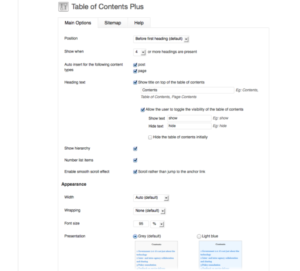
- Next is Table of Contents Plus: This plugin is used to automatically create a table of contents for articles and optimize for SEO.
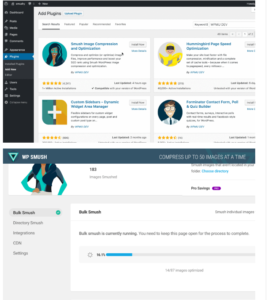
- Next is the WP Smush plugin: It is used to optimize your images to make them lighter and load faster.
- A very delicious plugin, cheap and extremely important, is UpdraftPlus – Backup / Restore: Its use is automatically and completely free to back up your website data.
- As I said in the previous videos, if you want to change the avatar of your live account, you need a plugin, then you will install the WP User Avatar plugin.
OK, that’s enough for now, but for more advanced plugins, I’ll talk more deeply and in more detail in the intensive courses.
Setup necessary plugins
- First, please activate all these plugins by selecting all plugins and selecting actions. Choose Activate and press Apply.
- For the Jetpack by WordPress.com plugin:
- Next WordPress SEO Plugin – Rank Math:
- This plugin has a lot of parts to optimize, so I only talk about the basics in this video.
- Please refer to my detailed video to know more about this great plugin
- To setup, go to the Rank Math section, select the setup wizard tab and follow the instructions
- Next is Table of Contents Plus:
- To use this plugin, go to Settings, choose TOC +
- You choose auto insert to page and post,
- The position is the display position. You can choose any position, usually leaving the default
- In the Heading text section, you can change the name, e.g., change it to Summary.
- Scroll to the bottom. You can choose the style for this content. Choose white for beauty.
- When done, click Update options again, and you’re done.
- WP Smush:
- With this plugin, there is little to set up. You go to the plugin and follow the instructions.
- Every time you upload an image, the plugin will automatically optimize for you without you having to do anything.
-
- But to be more optimal, you should still optimize before uploading.
- UpdraftPlus – Backup/Restore:
- To use this plugin, go to Settings, and choose UpdraftPlus Backup.
- Then select the settings tab.
- Here there will be storage options for you. Where do you want to save the backup? You can save it on google drive, dropbox or send it by email.
- You should save it on google drive for convenience and also quite safe.
- You choose the Google Drive icon, then click down and click save changes.
- Next to the Authenticate with Google section, click on the link to authorize this application to use your google drive.
- After the connection is complete, you can set the automatic backup time.
- If your website updates the content sparingly, let it back up once a week. If the content is updated continuously, let it be every day or 2 hours, 4 hours, or something up to you.
- Then click save, and it is considered that the website backup job is done. You will not have to worry about your website one day naturally dying without anything to restore.
- If you want to learn more about restoring the website, watch the video I have guided you and leave the link below the description.
- WP User Avatar:
- To use this plugin, go to the Members section,
- Choose the member who needs to update the photo, scroll down to the Avatar section
- Click Choose Image, choose an image from your gallery, or upload it from your computer
- Then click Update member, and you’re done. You have successfully updated the member photo.
⏩ Step 14 of How to Build a Website from Scratch step-by-step: Website speed optimization
If your website loads over 3s, you need to optimize it. Fast websites rank better which make it an essential step for building your website from scratch.
Factors that affect the websites’ Page Load Time:
-
The first is the server: if your server is too far away from the customer, it will be slow.
-
Second source code: You use WordPress, which has been optimized, so the story now revolves around the theme you use has been optimized for speed and whether there is any plugin that slows down the website
-
Using a website cache could be better. If you wonder what a cache is, it has many types. You need to understand that it will help your website load faster, but if you understand its nature, read the article.
-
The next factor that leads to slow loading is that the image is not optimized.
There are other factors, but in-depth, these are the main ones. You need to optimize them to build your website from scratch.
How to improve Page Load Time?
-
The first is to choose a strong server and a provider with a server near the customer.
-
The video said this to choose a hosting provider, VPS. Please review
-
Choose a theme optimized for speed use. Do not use themes that are too heavy and install only the necessary plugins. Do not install too many redundant ones.
-
Next is to use advanced cache plugins like WP Rocket, this is paid, but you get what you pay for, running fast.
-
If you want to buy cheap, the link is below the description. If you want to support the developer for $ 49, the link is also below the description.
-
And if you want to install free plugins, there are W3 Total Cache, LiteSpeed Cache, and WP Super Cache, …
-
Next is image optimization. Use image optimization plugins such as Smush and TinyPNG.
As long as you optimize these factors, your website will also have a relative loading speed.
How to Build a Website from Scratch step-by-step? Optimize the speed once you build the website.
Can I create a website by myself?
Yes, you can create a website from scratch by yourself if you follow the above steps. Believe me, creating a website is not very hard. You just need to focus on the steps.
Choose NameCheap to buy your domain, Bluehost to buy your hosting and start creating your website.
Is it hard to build a website from scratch?
No, it is not hard to build a website from scratch. You just need to take the decision to start.
Conclusion about How to Build a Website from Scratch step-by-step
So, I have finished guiding you with the basic knowledge to build your website from scratch step-by-step. Now, you can follow the above steps and build your website from scratch to start making money.
Tips for building a website
- You can choose a website builder like Envato to help you build a website with a beautiful design. Envato is the best website builder to create a website from scratch
- When you register a domain, choose a web hosting and choose a website builder, focus on quality and support more than money. This will help you solve future problems related to build your own website from scratch.
- Before you select a domain for building a website from scratch, look for something short, simple, memorable and related to your niche then register a domain.
- Don’t randomly select a template for building your website. You have to select a template that is modern, fast and responsive to desktop and mobile.
Looking for How to Build a Website from Scratch step-by-step and struggling to create your own website? Contact us to build your website for free!
Email us on MakeMoneyTactic@gmail.com and ask for Makmoneytactic Golden deal.
