Google doesn’t read web pages the way we do. This is certainly not a controversial claim. But with the unwavering insistence on creating pages for “humans” since 2006, it’s becoming increasingly common to ignore some technical fundamentals. That’s why you should learn how to optimize images for SEO to rank higher in Google.
In this article, Makemoneytactic will tell about some neglected technical SEO techniques, specifically, how to optimize images to boost rankings effectively. Topics covered include: What is image optimization and why is it essential; Detailed steps to have images on web pages and what tools we can use to optimize most effectively.
✅See also: SEO Basics: The Best SEO Guide for Beginners and More!
What is image SEO and why is it important to optimize images for SEO?
Let’s start step-by-step with the basics:
What is image optimization?
Image optimization means optimizing for images – here. It means following SEO best practices when inserting images into a web page to generate the most significant possible ranking benefit.
It includes efficient coding, adding Schema markup to image objects, using the best available resolution, and auditing your pages with tools like Website Auditor.
Why is it important to optimize images for SEO technically?
There are millions of SERPs with heaps of perfectly readable content containing all the relevant keywords, each of which is backed up by tons of backlinks.
A human cannot rate these pages from 1 to 10 because they are all great in our eyes. But Google had no trouble determining the top 3 results – getting 55% of the clicks. And it all depends on how Google, not humans, sees our page.
Take a look at the two pages below and try to find out what essential differences make one page possible to rank higher than the other:
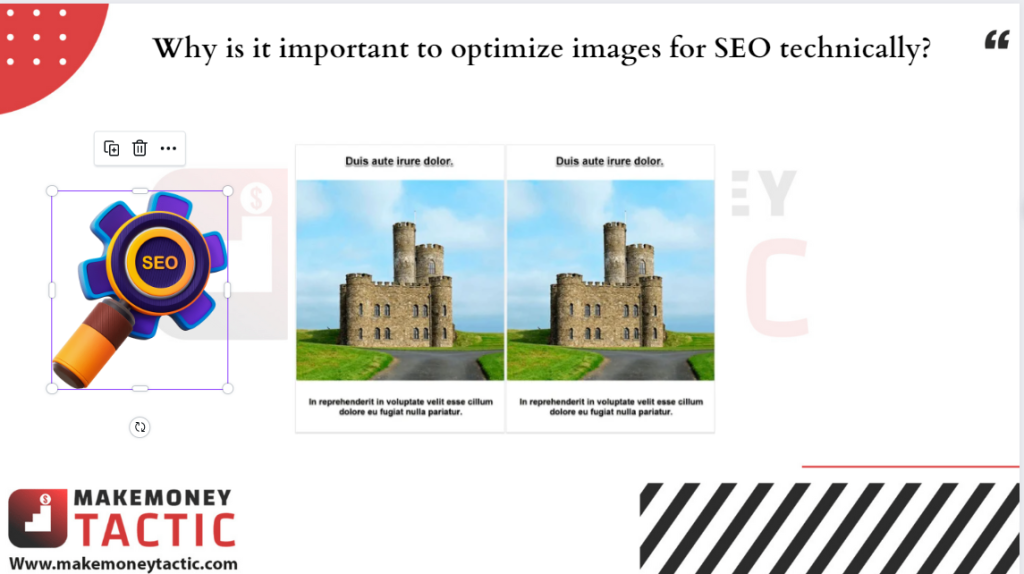
Can you spot the difference? The answer is no because they are nothing else, the two images are duplicates of each other, and for a human, there is no way to determine which one is likely to be ranked higher or more relevant than the rest of the image.
Now, let’s look at these two pages from a different angle; maybe you will see the difference clearly:

Even though the on-page results are the same, the code is entirely different – to the point where the left paragraph can cause the page not to rank. And the code is what the search engine actually reads, not what can be seen from the interface of a page.
This is why it’s important to follow best practices when inserting images into pages. How you add these images and place them on the page, what tags you use, what you write in the description tag, what images you allow to display – all of this matters. This makes sense for search engines to read those codes.
Pro tip: Which pages should prioritize the “optimize images for SEO“
While it may seem like any website can benefit from better image optimization, the ones that should be the top priority are definitely e-commerce websites. ,
Not only is there a high level of competition, but the content relies heavily on images making them the top pages in the industry that need to do a good job of this optimization.
Consider this: with hundreds of thousands of pages, each with at least one or two images of the product in question, e-commerce sites have plenty of opportunities to exploit. Add to that the reality: proper optimization gives more space to deploy the right keywords, and the need to optimize for images has become very apparent.
Best practices to optimize images for SEO:
Now that you know what image optimization is and how important it is, let’s learn how actually to do it.
While some proven principles work, like any other SEO advice, you must understand that everything you hear and read may not be perfect. 100% correct, as rankings can vary widely for different topics, sectors, and levels of competition.
What you need to know about the <img> tag
The top advice for optimizing images is to use the <img> tag along with the <alt> attribute, for example:

In it, the <img> tag inserts the image and the <alt> attribute describes the image.
Generally, this is a good practice, but things are often much more complicated than imagined.
Why do we have to fill in the alt text alt text?
When Google crawls your page, it first downloads all the text found on it as a large pile of code.
It then divides this content into groups – this is where HTML-5 comes into play, as semantic tags help Google orient itself around your text and determine what they are.
At this point, an <img> tag with the <alt> attribute is read in the same way as other text, such as those grouped by <p> tags.
When Googlebot reads the image tag, one of the following will happen, depending on how you implemented the <alt> attribute:
- No <alt> attribute at all — this is the worst-case scenario because Google won’t be able to get any context for the image itself and will consider the image unimportant to the web page. This image will never rank and may even hurt the page’s ranking.
- The <alt> attribute is empty — this is a much better situation than the one above. When they see an empty <alt> text, search engines automatically see your image as an illustrative element – embellishing the page and trying to make sense of it through its context.
- The <alt> attribute is already populated — this is most useful for ranking purposes. Search engine crawlers/crawlers will use the <alt> attribute to determine the image’s meaning and assist by further analyzing the surrounding content. Thus, crawlers want to see what the image means, the context, and how relevant it is to the searcher.
Before the scan foam processes, the non-textual content of the page, your <img> tag, is actually not read, while the <alt> attribute is still read like any text content.
This is exactly why optimizing images better first requires that you always add an <alt> attribute, even if you don’t have the resources to fill them in one by one. And second, you need to know the right way to add content to the <alt> attribute to improve your ranking.
Pro tip: Don’t worry about the <title> attribute and the captions for the image (caption)
The <img> tag contains the <title> attribute, which indicates the title of the image, but it is not the same as the actual name of the image. The <title> attribute can be important, but it is only used to consider an image if there is no <alt> attribute. Even if you have an empty <alt> attribute, the content of the <title> won’t matter.
So, changing the image filename won’t impact your rankings unless you intentionally ignore this advice and don’t put any <alt> text.
Next is the caption of the image. While there is a lot of advice to use captions for images, everything is not so clear and straightforward.
Within the <img> – tag you should use to add your images, there is no attribute like <caption>. Instead, it is an attribute of the <figure> tag, which is also sometimes used to add images to a web page.
So why don’t we use the <figure> tag for our images? It even has a <caption> attribute. The problem here is that unlike <img>, <figure> has a particular purpose. It is used to inform search engines that the image contained within this tag is self-contained and should be interpreted separately from the rest of your page. So, your page doesn’t need it and can still function without this image. In other words, it completely neutralizes any ranking power that image might have on your page.
However, if you have a situation where you need to use a large amount of text that doesn’t act as <alt> text – then what you need is HTML-5. In this language, you add a specific piece of text. And this text will be read by search engines like any other text without much impact on the image.
The perfect <alt> text to optimize images for SEO

The two best ways to get the most out of your images include:
- <alt> tags need to be implemented not only as descriptions for images but also as part of the content you are writing.
- The image you are describing needs to be really relevant and relevant to the content surrounding it.
You need to remember here that the <alt> attribute for an image is not its filename nor a copy of the title.
Unlike the above two objects, <alt> text should be text that can replace your image, and fit the context of the content around it.
There are two common mistakes that webmasters often make:
- Copy the title of the image or webpage and use it as <alt> text
- Use the same <alt> text for several different images
Avoid these errors as much as possible because search engine crawlers often miss duplicate <alt> text like any identical text.
Filling in <alt> text just because it needs to be filled out certainly won’t make any difference from an optimization perspective. It will undermine the effectiveness of images that could have helped you rank higher if you implement <alt> text properly and sensibly.
Instead, you should follow the best practices for monetizing text tags, such as the <p> tag – making your <alt> text easy to use and understand.
Start with a capital letter just as you would at the beginning of a paragraph, and put a point/full stop at the end of the sentence before closing the tag.
How to check optimal condition for <ALT> attribute and broken images?
Managing image optimization for a website with hundreds of thousands of images isn’t easy; without a powerful tool, it’s almost impossible.
In this article, we will introduce you to a website Auditor tool. In this tool, there are several ways you can monitor the health of <alt> attributes: you can view an overview report or go into detail and analyze image optimization at the level of Each page.
First, if you want to see an overview of image optimization, you can click on the “Site Audit” module on the left toolbar and scroll down to the “Images” column.
You will then get an overview report of all broken images and empty <alt> text that the Website Auditor finds on your website.
But if you want to test a specific group of images, you can switch to the “Pages” module, which stores all your scanned images. You can add image filters and test a certain number of pages on which you want to focus your image optimization.
If you see that most of your pages don’t have <alt> text filled in, then start with the ones that need the most ranking power: the homepage, the landing pages, and the product pages.
Since integrating a properly optimized image onto a page is quite an uphill task, structure it so that it gives the most power to the pages that need it most.
And once you’ve identified a page that you’d like to optimize for better, right-click, select “Analyze Page Content,” and continue to the “Page Audit” module – where you don’t just see whether <alt> text is filled in, but also whether related keywords are placed in it.
How to use the src and srcset attributes to index the highest quality images and optimize images for SEO?
In the <img> tag, there are two essential attributes in SEO that are often overlooked: src and srcset. Here is a code example of these two properties in action:

The src attribute is quite old but still has a substantial value. Since the introduction of the <img> tag, it has existed and is used to specify the source URL for the image you want to deploy.
The srcset attribute only appeared with the release of HTML-5 6 years ago, and its job is to define a set (src_set) consisting of specific images with certain sizes, resolutions, and sizes.
This is done to allow web browsers to display only images that are completely appropriate for the type of device accessing the page. There is a reasonable question that SEO professionals would ask here: Which images in this set will be indexed by Google?
The answer is simple: For an image to be indexed, use the src attribute. For an image to be displayed, use the srcset attribute.
This means that unless you need support for older web browsers, you can get Google to index the best, highest resolution images. So, while the users visit your site, they will see the image that best suits their device.
This can be of great help, as image quality is one of the best practices recommended by Google and also an important ranking factor overall.
Advanced Tip: Increase image resolution
Image resolution matters when you’re trying to rank for visual content. Of course, Googlebot can determine that you used software to “pull” the image out, and it can tell if the image is blurry or difficult to see…
But, even though we know that the highest resolution image should still be indexed, even if it is considered blurry, the image will still be indexed and considered very high resolution.
There is an application that really does this, ImageMagick:

This application not only ” stretches” its images while reducing quality but also adds multiple layers of filters. The more you want to “drag,” the more blurred the image will be, but it’s still one of the best free solutions available today.
✅See also: 25+ Sources for Trending topics for Article Writing
How to use schema markup image object to optimize images for SEO and boost rankings?
Structured data is a great way to enable the features of results on the SERPs (SERP features), thereby increasing CTR.
However, there are hundreds of different markups that Google can read. They have absolutely no effect on your results on Google, so, unfortunately, they are often overlooked in most cases.
An essential markup for Image SEO is ImageObject:
https://schema.org/ImageObject
It is used to signal the location of an image and provide information about it. Here is an example of this Schema in action:

We need to use this Schema mainly because of the <thumbnail> attribute.
How to use the <thumbnail>. attribute?
Google has a guideline for both article images and product images:
“For best results, output multiple high-resolution images with the following ratios: 16:9, 4:3, and 1:1.”

This means that for every image you upload, you must have 3 more images with these ratios. Of course, users will never see these 3 extra images, and we don’t want that to happen either.
Through the <thumbnail> attribute, you can add 3 additional images to every image on your page. These thumbnails will be crawled and indexed – and they will also be the images that appear in search results for user queries.
In other words, the webpage contains a Schema markup, which includes links to images that the user will never see, thanks to meta tags whose sole job is to inform Search engines which preview thumbnails an image has.
Search engines will then use these thumbnails in their search results.
Where to find images to use: should I use stock images or create my own and optimize images for SEO? or USE Canva
One of the most critical issues in Image SEO is uniqueness. You shouldn’t “steal” visual content from another website as that violates the DCMA digital copyright act, and you could suffer some severe consequences.
While we all acknowledge that image uniqueness is an essential factor in optimization, many people still choose to use stock images because they are faster and easier.
But the best recommendation is to prioritize creating your own images and not using stock images, even if you buy them. Consider this: even when you’ve purchased a stock image, Google doesn’t know about that information. Instead, they just know that this is an image that was indexed a long time ago.
Google knows the source of that photo, its author, and publication date meaning that even if you’ve uploaded it to your website, the only way to get some benefit from it is to do so. Ensure you get the highest quality possible – preferably higher than the quality at which the stock was initially indexed.
If so, then you really have nothing to worry about. But unfortunately, there is a common practice among stock image providers: they will sell images with a resolution significantly equal to or lower than the images they have uploaded to the website.
In that case, the image will not help your optimization efforts, and you should ask for a refund.
Advanced Tip: Avoid “stealing” images with by-line, source, and copyright notice attributes
Taking pictures of each other often happens online. Since Google loves pages with images and creating them takes time and money, you can often see another website “steal” your images and all your code and try to use them to get high rankings.
To avoid this, you need to ask your encoder to add specific attributes that indicate who owns the image via IPTC standard or ImageObject markup.
There are 3 essential properties to take care of here:
- Author (artist; creator) — the author of the image to be placed here.
- copyrightNotice — put a link to your copyright license and its description
- source (credit) — insert a link pointing to your website or the website you got the image from.
If your competitors copy the code you use for the image, Google still considers you the real owner of it and favors you, thanks to the above tags. However, if the thieves want to remove those tags, Google will still give you preference because they encourage us to use these tags.
You can also use Canva to create high-quality images for your website. It is easy and amazing. I used it for most images in this blog post.

✅ You can also see: How to Create Images for Website in 30 Seconds with Canva?
Which image format is most effective for SEO?
In the past, we had many image formats to consider, such as JPEG, PNG, or GIFs. For now, the problem of which image “tails” is best has been solved much more neatly: because the webP format is now almost unrivaled.
Nearly every popular web browser today has native built-in support for the webP format, the conversion process doesn’t take long, and images with the webP extension are about 25% smaller than the image in the JPEG and PND endings, whether we’re talking about lossless or not.
Sure, some utilities can compress even more efficiently, but the same number of web browsers does not support them.
Furthermore, webP is supported by 80% of the browsers of Internet users globally. That means we should prioritize investing wisely for these audiences and use the webP format. And for the remaining 20%, we can still use the traditional JPEG format.
How lazy load and cdn can help to optimize images for SEO?
Another popular piece of advice you can get about Image SEO is: Use lazy loading and CDN (Content Delivery Network) for your images. They are considered mandatory if you do not want to reduce your page speed.
Of course, page speed is essential. But when do we sacrifice other optimization aspects to improve page speed further?
Let’s dig deeper into this and see if lazy loading and CDN really work and when you should use them (if at all).
Should we believe in lazy load feature?
Concept: Lazy loading or lazy loading is a technique in programming that makes you not download all the objects on the page at once. Instead, it will “trick” the web browser into loading the image down as soon as they appear, thus winning in terms of page speed.
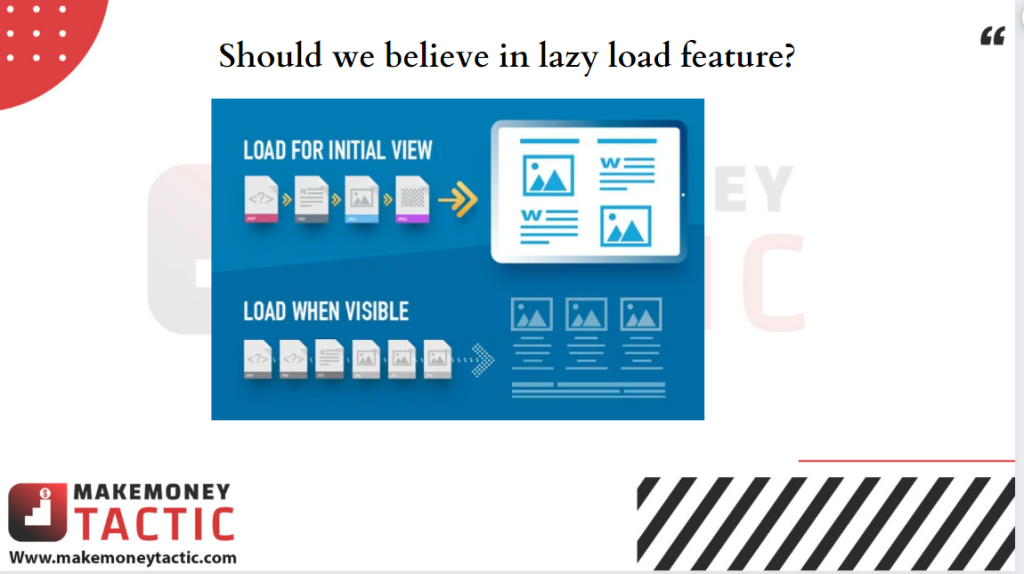
If you don’t need any of the power generated by optimizing for that image and want to focus on speed, then use lazy loading. Even though it’s called “lazy,” it’s extremely useful for speeding up a page.
However, if you want more power and you don’t have hundreds of images on the page (literally), this feature should be limited.
The problem is: It is very difficult to ensure that Googlebot always interprets the logical js operators on our web pages. Thus, lazy loading can remove all the ranking power that images have created. At the same time, the trade-off in speed is often disproportionate and sometimes insignificant.
A more detailed explanation of Lazy Loading
Google always recommends using lazy loading.
This makes a lot of people very angry and confused because although Google has been recommending it for many years, all the time, Googlebot can’t read lazy loading commands because it only collects lazy loading commands. Our code is a large block of HTML text.
This means that if you follow the advice of applying lazy loading to your website, you are falling into a situation of “smashing his back.” There is a way around this problem, which is the <noscript> tagز
But it’s still not a perfect solution because the crawler cannot interpret js logical operators correctly and crawl what we want.
This situation has improved somewhat since Googlebot started using Chrome browser version 76 to crawl the pages. However, the problem remains: crawlers can’t always “comply” with commands to not index what you declare in the src, but instead will crawl what you include below—data form.
Plus, applying lazy loading to a webpage with only 10 images on it isn’t functionally optimal – most of your readers will be able to access those pages without any problems. In that case, lazy loading won’t even do much for page speed since speed is already good enough, to begin with.
In short, the advice here is that if you don’t really care about the amount of organic traffic coming from images and you have a page with dozens of images, then you can completely use the “lazy loading” feature.” this. And if not, it shouldn’t.
Should we use a CDN?
Definition: CDN (content delivery network) or content delivery network is a system of servers rented to different websites to improve page speed and handle excessive traffic.
Your users will respond to your web pages faster because their visiting servers are closer to them.

If you are dealing with a huge amount of traffic, “PING” (Packet Internet Grouper a cmd command used to check whether sending a data packet between two addresses has failed and the time it takes to send the data packet) If this goes from the device to a server and how long it takes to get a response back) You should use a CDN for your servers with a more than 80 ms response time. But otherwise, a CDN could do more harm than good since we are forcing web browsers to work longer to deliver the same results.
A more detailed explanation of using CDN
In terms of actual results, a CDN is only useful in certain situations, such as:
- You suddenly receive a large amount of traffic that your server cannot handle.
- When a CDN provides you with some additional services or features, for example, batch converting images to webP format.
Outside of a few cases like the one above, CDNs aren’t that useful, and that’s because of their nature of CDNs.
Functionally, a CDN is another server you rent to provide a faster experience for your website visitors because it is “closer” to them. But what really happens to a CDN is that, no matter how you set it up, you’re forcing the browser to make two connections: one to you, and one to your CDN.
If it’s the fastest, it also takes the browser about 30ms to make this connection to your CDN. And that’s not to mention problems like TLS/SSL handshake (the process by which both client and server sides confirm each other and initiate secure “communication”), congestion, routing problems, etc. Considering these, the ping won’t be 30ms as advertised but much higher.
The time it takes to connect between the server and the browser can be up to hundreds of milliseconds. And those lost milliseconds are the advantages webmasters want when they choose to use a CDN in the first place.
So for sure, a CDN can be useful, but only in case, your guests have a ping to the server that exceeds 80-100ms. However, consider that this is a ping (not a technical issue) of a browser accessing a server halfway around the world. And we can hardly imagine a website with many visitors far away without any of their servers near these objects.
Also, over the last 10 years, we’ve been told that “host location” has an impact on rankings, and it’s better to place servers closer to your audience.
And if your ping is lower than 80ms, CDN will not give any significant value and, worse still, can cause worse performance than the present.
✅See also: How to Drive Traffic to Your Website: Learn the 33 Free Methods
How to use Google vision to test Google’s AI technology to recognize images?
One of the most valuable tools used by SEO professionals when optimizing for images is Google’s Cloud Vision API. Fortunately for all users, this tool offers a trial version, and after the trial period ends, it is also very easy to use: https://cloud.google.com/vision/docs/drag-and-drop
Just add the image you want to put on the webpage and see how Google interprets the image. Here is an illustrative example of the processed result:
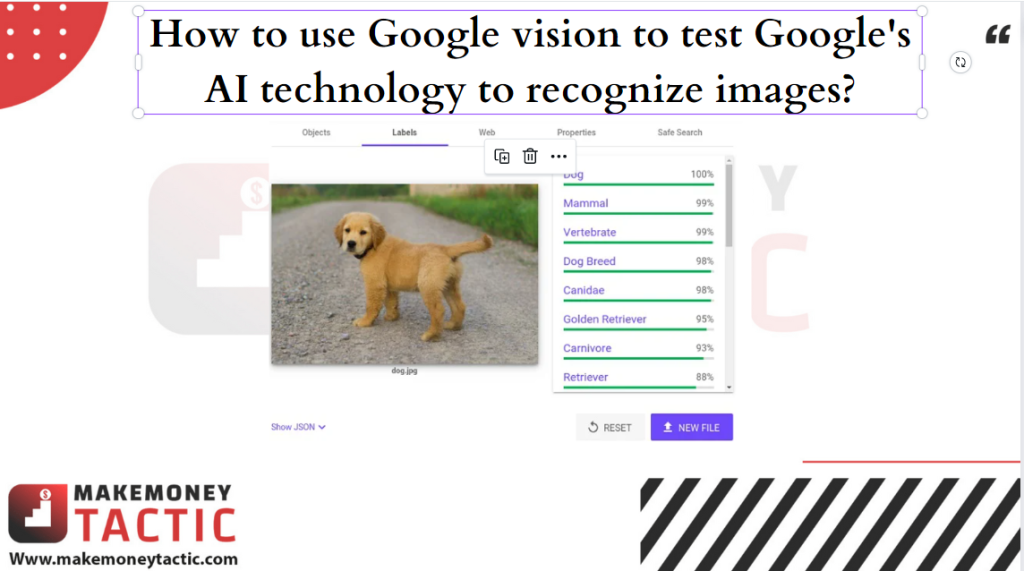
This tool is handy because it shows that Google can identify this dog from the photo, even though it is a Golden Retriever breed. You can also discover how Google reads the text on your pages, how your images will work with Google’s Safe Search mode, etc.
In the “Labels” column of the Google Vision API, you’ll see search queries or “labels” identified by media analytics after your images have been crawled. , indexing and analysis.
The industry that benefits the most from this is the medical service. Unfortunately, many images uploaded to medical service websites are labeled “adult content.” And as a result, these images will receive corresponding penalties and, as a result, may not appear in safe search results.
Since Safe search is the default setting for most searchers, and we often don’t turn it off when searching for medical services, these websites suffer a lot in terms of rankings as well as CTR rates.
Summary of how to optimize images for SEO
This article covers everything you need to know to optimize images for SEO in order to start generating more ranking power from your images.
There’s a reason optimizing for images is often overlooked – it’s complicated, time-consuming, and laborious. But if you can stick to what has been suggested so far, and persist in taking it to a more and more perfect level, then the ranking benefits will certainly make you feel satisfied. !
