Creating a blog is a dream for everyone looking to start making money online. Almost everyone is asking how to start a blog, and searching on Google for “how to make a blog”. Don’t worry, you’re in. Here, I will give you an easy step-by-step guide to building a blog in no time and with the least expenses. I will also teach you how to make money from your blog from scratch.
Today, creating a blog is not hard at all. You don’t need any technical or coding skills to create a blog and start making money from it. You just need a few tools and a step-by-step guide to do it. With a few clicks and less than 20 minutes, you can create a blog and start to make money online from your blog.
Let’s not waste any time and start with the basics…
Should you start a blog?
There are plenty of reasons to create a blog, you may have a lot in your mind too. However, here are the two poplars reasons to create a blog:
- Share your knowledge: People with certain knowledge in cooking, drawing, crafting, etc… create a blog to share their knowledge and tell others what they can do. This makes them happy and famous. Whatever your passion is, you can create a blog talking about it from fashion to health and more.
- Make money online from their blog: This is a clear reason to create a blog as there are many ways people follow to make up to 1k$ and more every month from your blog. So, why don’t you do the same? You can also create a blog and earn passive income
How To Start a Blog in 10 Easy Steps:
As said before, you can create a blog in 20 minutes, but I recommend reading each step discussed below carefully and applying it slowly if this is the first time you start a blog.
Don’t worry, I explained everything in detail to make it very easy for you. Here are the 10 steps to learning how to start a blog:
Step 1: Pick a niche for your blog, Micro-niche
The niche or the topic is the main idea that all the articles and products go around. I know you may be excited and thinking of creating a website with tens of categories discussing politics, health, food, travel, animals, Cinema and more.
This will need hundreds and thousands of articles from you as well as months to rank on Google.
Popular, successful blogs are those which focus on one niche. Focus on one. niche only so you can easily cover all its aspects.
How to choose a niche?
You can’t choose any niche that comes to your mind, as some niches need a lot of searches which may not meet your personality and time, while other niches may need experience you don’t have.
When you start looking to pick a niche for your blog, keep in mind these 4 factors:
- Choose a niche you are passionate about: If you like cooking, playing football, etc… Make it your niche.
- Choose a niche you have enough knowledge about: You can’t make a blog about doctors without being a doctor, or about lawyers without being a lawyer. Such niches need deep knowledge in this field.
- Make sure the niche is profitable: Some niches are more profitable than others. Choose a niche which has a lot of affiliate products related to it. You may also choose something that you can create courses and eBooks about.
- Find whether your niche has a lot of audiences: Sometimes you create a blog, write a lot of content then find that the traffic is too low. When you look at the keywords and their search volume, you find that there is no audience for this niche. What a waste of time!
These are the most important factors which you must pay attention to when picking a niche for your blog.
Are you still confused about choosing a niche? let me help you with some tricky ways to choose a topic for your blog:
- Create a blog about something you like. (Say you like cars, sports, gardening, painting, etc… Start a blog about it.)
- Are you a doctor, lawyer, or online freelancer? Start a blog about this thing which you’re an expert at. It will be very useful for others.
- Are you starting a diet, building a house, learning a new skill, or else? Share the steps of your journey with others in a blog.
- Would you like to be an influencer and share your details or even life experiences with others? You can do it.
I guess you got some ideas for your niche. Write them on paper and give yourself some time to choose what makes you more excited and capable of providing real value to your visitors.
Learn how to choose a profitable niche in this GUIDE.
Step 2: Select a blogging platform, free or paid?

After picking a niche, you have to select a blogging platform for your blog.
You have two options for your blogging platform:
- Free hosted blog sites.
- Self-hosted WordPress blog.
I will explain both options, but I highly recommend choosing the second option, the self-hosted WordPress blog solution. Believe me, starting a blog on a free platform is a bad option.
Free Hosted Blog Platforms (Blogger & Tumblr & Wix)
When you search for a free hosted blog platform, you get many results like Blogger, Tumblr, Wix, WordPress.com or else. Although it may seem tempting to start for free but will hate yourself later if you do it because you will face a lot of limitations, especially in monetizing your blog.
Limitations of using free hosted Blog platforms:
There are many limitations if you choose to use free hosted blog platforms like:
- Not having your custom domain name:
Unfortunately, your website’s link won’t be YourBlogName.com, but the link will contain the platform’s domain. For example, your blog’s link will be makemoneytactic.blogspot.com or makemoneytactic.Tumblr.com instead of just makemoneytactic.com.
The taller and more complicated your link is, the harder it is to remember it. It also looks unprofessional.
- Limited monetization options
Unfortunately, you can’t make as much money as you do with regular blogs as these platforms cannot be monetized with ads. Some of them don’t even allow you to add affiliate links.
- You don’t have total control
In the case of free hosted blog platforms, you are working on a subdomain and not a domain. Moreover, you have no control at all over your host or domain. You can’t make any changes to it.
- You cannot install premium themes
These platforms provide you with some free themes to use. You are stuck with them and can’t upgrade to a premium one. This means losing a lot of fruitful opportunities.
- You cannot install plugins
Plugins help in managing our website. I have more than 15 plugins on my website for my newsletter, push notifications, affiliate links, SEO, insights and more.
With free hosted blog platforms, you can’t install plugins on your website which is a big loss for your business.
- Your blog can be shut down
These platforms have lots of terms and conditions. Sometimes, they have strict rules for managing your blog. This means that they can ban you and close your blog if you don’t follow all their rules.
- No Custom Email Address
Unfortunately, you can’t create a personalised and custom email address with free hosted blog platforms. Such emails usually look like name@yourdomainname.com which is so professional.
- Upgrading is expensive.
Furthermore, if you decide to upgrade your free blogging plan to a premium package to get more benefits, you’ll have to pay a lot of money.
Self-hosted blog platforms (WordPress.org)
On the other hand, we have the self-hosted blog platform which I highly recommend as it has a flow of advantages and benefits.
With a self-hosted blog platform, you can:
- Create a full customised domain name such as makemoneytactic.com
- You can monetize your blog with ads like Google Adsense, affiliate links, affiliate banners, etc…
- Control your files, your domain and your hosting.
- Access your server at any time to do anything you want.
Recent statistics showed that more than 90% of websites in America and more than 40% of the websites over the world are powered by WordPress. That’s huge!
Actually, WordPress is not used only for creating blogs but for all kinds of websites.
Note: Here, we are talking about the open-source WordPress.org. It is a non-profit, free blogging tool that anybody can use. You just have to install WordPress on a hosting. You’ll have your own blog without limitations. It is hosted on your own server and opened using your own custom domain.
That’s what I am gonna teach you in this step-by-step guide.
Note: I want to go deeper with explaining WordPress.com as we don’t want to use it. This is PAID blog hosting solution that looks exactly like WordPress.org with a lot of limitations.
If you are creating a blog to make money from it, it is okay to spend some bucks every month as you’ll earn much more.
How much does it cost to start a blog?
Some think that it costs too much to start a blog. This is untrue. Actually, it costs just a few bucks to create a blog Into a self-hosted platform and start blogging. I’ll make it easier for you. Let me give you some numbers.
To start your blog on a self-hosted blog using WordPress.org and get all the advantages, you need two essential things:
- Domain name: After picking a niche, you’ll have to choose a domain like mine: makemoneytactic.com. This usually costs $10-$15 per year. The renewal also costs the same.
- Web hosting: Besides your domain, you’ll also need a reliable web hosting service. Bluehost is one of the top hosting services in the market. It is professional, friendly and cheap, costing less than 5$ per month.
As I prefer using Bluehost because it is recommended by WordPress itself, This guide will be based on Bluehost. I’ll explain how to build a blog using Bluehost. They really offer a great hosting solution.
Why Bluehost?
The answer is simple. Bluehost has many advantages like:
- Bluehost is recommended by WordPress.
- Its price starts at $3.95 per month, including a free domain and some amazing goodies(if you sign from this link). This is considered very cheap compared to other web hosting solutions.
- More than 2 million websites are using Bluehost to host their websites.
Did you get your hosting yet? if not, you can buy it from the link below and get a great deal which includes:
- Bluehost hosting provides a big discounted price. You’ll pay $3.95/month instead of $8.99
- You will also get a free domain name ( Get it for free instead of paying $10-$15)
- You can also get a free custom email addresses
- Installing and setting up your blog with Bluehost will be done in just one click
Get Your 55% Discount for Bluehost & Free Domain Name
Step 3: Pick a domain name with .com extension
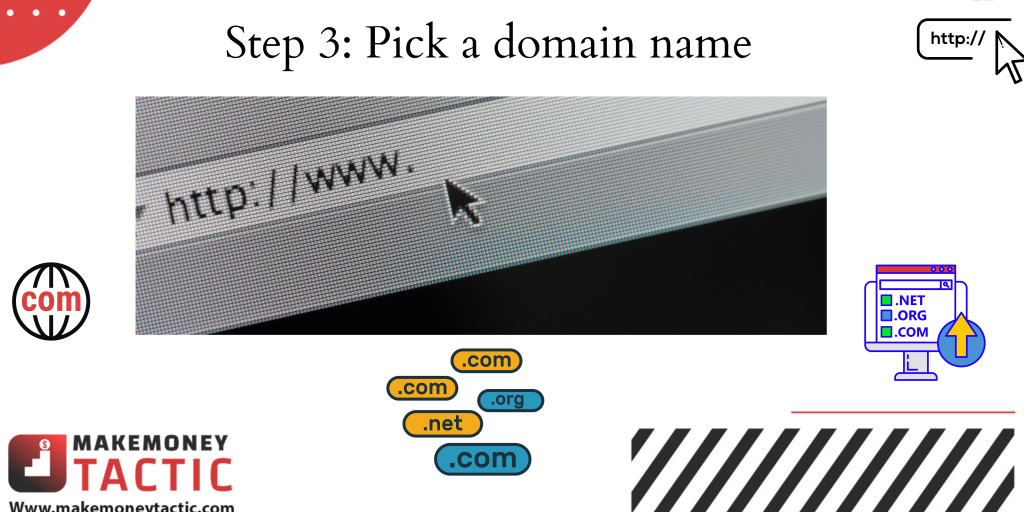
As mentioned before, the domain name is a link that people click or type in search engines to find your blog and visit it.
Let’s say my blog is called makemoneytactic, then my domain will be makemoneytactic.com. Got it?
Domains are not expensive. You can usually buy a domain for $10 to $15 per year. Then, you have to renew it annually. The renewal price is approximately the same.
register and own one, and as long as you. However, if you did like me and got your hosting from Bluehost, you’ll get a free custom domain for the first year.
You can only choose a domain name after you have already selected your niche. You have to brainstorm some name ideas and write them in front of you. Then, you have to check them one by one if they are taken or available to register.
General tips for choosing a domain name:
- Keep the name specific
Hoping that you chose a micro niche to blog about, choose a specific name that reflects your niche.
- Choose a brandable name
Having a memorable name is an advantage. It will be easier for your visitors to remember it.
- Stay away from hyphens or numbers
Names with hyphens and numbers are usually complicated and hard to memorise. Stay away from them and choose easier ones for your blog.
name.
- Try to get a (.com)
Honestly, all extensions act the same in the case of SEO, speed, etc…, but for unknown reasons, people like and trust the (.com) extension more than any other extension. So, let’s choose what the audience prefers and find it easier to remember.
I highly recommend choosing a (.com) extension except if you got an amazing name whose (.com) version is not available. Here, I would suggest (.net) or maybe (.co). I don’t really prefer ( .org) as these are usually used more for non-profit organisations.
Finding a good name is simple. Type the name into the box above, and wait for seconds. All the names will be displayed automatically in front of you. Some names will be available while others will be taken. You can try a different combination, change a letter, add something at the end of the word to make it unique, etc… Keep trying till you find something you like.
It is cool to get free things as we want to minimise the payments as much as possible. Gratefully, you’ll get a free domain name with Bluehost. Just register from this link: Get a domain name for free in the first year.
Step 4: Get web hosting for your blog with a recommendation

The term is simple. Web hosting is the most important element of your blog. It keeps your blog online and accessible 24/7 so that your visitors can visit it anytime from any browser. Everything will be stored in the web hosting. All the files like the images, themes, and even your content can be found in your web hosting. Imagine your building a house, the domain would be its name and the hosting is the land you are building on. Do you understand web hosting now?
For creating a blog, you need a domain and a hosting service. Remember that your blog won’t function without them both. You have to buy them both to get started blogging.
Fortunately, Bluehost is generous with bloggers providing 2 in 1 Offers. Buy a hosting and get your domain name for free.
I will not lie and say that it is the only way to do that. You can buy hosting from Hostinger or Hostgator, and get a domain name from Namecheap. These are also great suppliers, but it is just easier and cheaper with Bluehost, especially for beginners. After all, you’ll pay for your hosting only at Bluehost, and get the domain name for free.
Moreover, there will be some manual configurations which should be done at the nameservers. It would be a bit complicated. So, save time, effort and money by going directly to Bluehost.
When I started my blog, I chose this shared plan which is really all that I need. Its features are. perfect and price is perfect too and meeting my budget, especially that we need months to start getting more than 100,000 visitors. At this time, we’ll have to upgrade.
See this amazing offer that I got:
The plan is called #1 Official Hosting by WP. If you chose this Bluehost service, you’ll get:
- Domain Name for free!
- Email Address for free!
- SSL Certificate for free!
- One-Click WordPress Install
Click here to Get Your Bluehost Discount + Bonus before the offer ends.
Step 5: Starting a blog on WordPress with Bluehost in minutes
Here all the suspense comes! Now, we will start working and creating the blog.
➡ Visit the Bluehost website
First of all, go to the Bluehost official website. You’ll see a big green button. Click it to get started.
➡ Select a hosting plan
Now, it is time to choose a hosting plan. Each hosting plan comes with certain features. Your choice must depend on your goal and budget.
You can choose the starter package for only 3.95$ per month, or you can pay more. and get a bigger package. For a beginner, I recommend taking the cheaper package as it has everything you need. Don’t pay extra money as you would need them later.
➡ Pick a domain name for your blog
At this step, you have two available options:
- Option A – If you choose a domain, you can check it and see if it is available. If taken, try to make some changes to find something similar available and register it straight away.
- Option B – If you are still struggling to find a name for your blog, continue setting up your blog now and then come back to add the domain later.
➡ Create an account with Bluehost
At this step, you will have to select the account plan. Notice that the more time you choose to pay in advance, the more discount you get.
For my business, I usually choose 12 months to save a few bucks. This also let me focus on the blog itself instead of coming every month to renew the hosting. But it is up to you.
Remove the extras provided by the package to save as much money as I can
We don’t really need any of these additions. You may prefer to leave the domain privacy one but uncheck all the others.
➡ Payment Information
Is it taking too much time with you? Don’t worry, that is just because it is the first time. We are almost done as we are now going to add our payment info.
In general, you will see that they are asking to pay you with a credit card. If you don’t want to use this payment method, click on the “more payment options”.
You will also find PayPal.
That’s great, you have two options to pay
Choose the best one for you and use. to pay.
Don’t forget to tick the box next. to the terms and conditions then pay for the service.
Great, you’re paying 71$ only for a year of hosting, and you’ll get a custom domain for free as well as other goodies.
From now on, you can forget about payments for a whole year, and just focus on blogging and promoting your blog to make money online from blogging.
This is a great business idea if you think of it with numbers. Paying less than 100$ for a business, and gaining more than 500$ per month. Oh my God. Although you won’t make all these profits from your first month, you’ll do them gradually.
I even know bloggers who live from the profits of their blogs.
Imagine getting 5000$ every month for writing and promoting. That’s really awesome!
➡ Finish setting up the account
Finally, this is the last step. Choose a password for your Bluehost account.
Congratulations… you have finished buying your host, and now it is time to set up your blog on Bluehost.
➡ Setting up your blog on Bluehost
This is the step where you feel as if you’re taking major steps in building your blog
After completing the payments, Bluehost hosting is active, and you will be redirected to the log-in page to start creating your blog. Follow these steps to start your blog:
- Log in to your Bluehost account
To login to your Bluehost dashboard, enter the email and password which you used to create your Bluehost account.
- Skip all the unnecessary services
As it is the first time you log in, you will see Bluehost displaying some offers and services like building a blog for you. Skip all this as it will cost you a couple of hundred dollars.
Skip every step and don’t worry about all this. I will cover all the steps and teach you how to create your blog for free!
- Open Bluehost dashboard & Create a WordPress site
Now, the Bluehost dashboard is in front of your eyes. It is clear and friendly.
At this step, you have to click on the Create a WordPress button to start installing your blog.
- Type a blog name and a tagline
This is simple. Don’t panic and just follow me. Type your blog name and a write tagline then click on Next.
- Choose your custom domain name for your blog
If you already set a custom domain name when creating your Bluehost account, you just have to choose it here. Otherwise, you can simply create a new custom domain here.
You can also choose any additional plugins which you would like to install. I usually install wp forms and Moster insights only at this step to easily create contact forms and get all the analytics. However, you can choose some plugins or skip them for later.
- Your WordPress blog installation is Finished.
Setting up your blog will finish in seconds, and a new page will appear providing you with your blog name, username, and password.
These details are very important and must be kept safe, so make sure to save them. on a notepad that no one can reach.
From now on, You will use these given details to log in to your blog.
And That’s it.
Congratulations, you’ve done it. You finished the hardest part of starting a blog. The next steps are the best for me as we will choose a beautiful theme and design our awesome blog.
Now, let’s head up to our blog’s dashboard by clicking on the Login to WordPress link
Step 6: Select a WordPress theme and customize the design
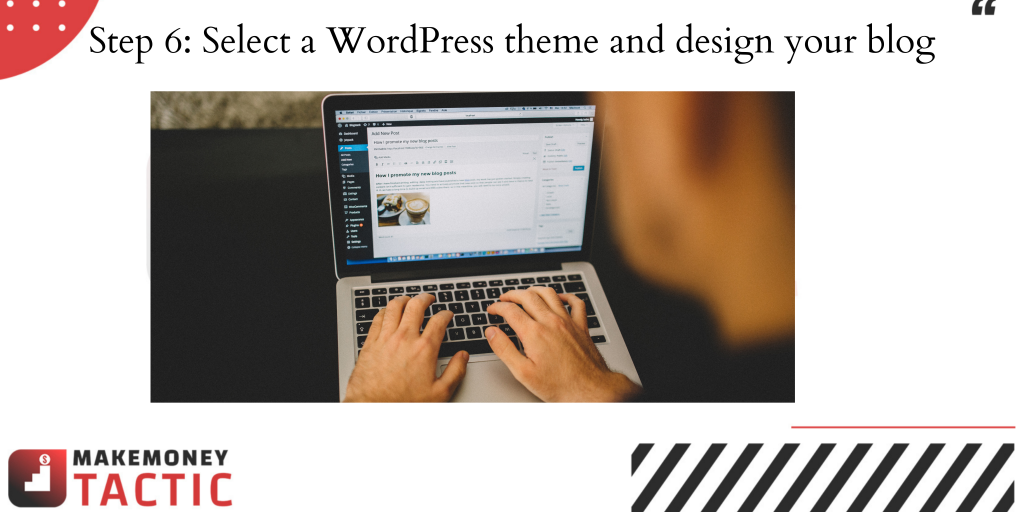
Here is the place where you manage everything related to your blog. Every task, every addition, every plugin installation, and every piece of content starts here. This is your blog dashboard. So, let’s start:
➡ Select a blog theme
The first step here is to choose the theme of the blog. This is the design of the whole blog.
To set your theme:
- Go to the menu on the left side of the screen.
- Click on Appearance and then select Themes.
In general, the blog comes with the Twenty Twenty-One (This is a default theme). You can use it if you want, or you can click on the “Add new” button for choosing a new theme.
You’ll see amazing themes available for free like GeneratePress and Kadence and more.
I recommend seeing a few of them, previewing them and then choosing what you like the most and what you feel is better for your blog.
Take your time till you find the perfect blog theme for you.
If you didn’t find something good, you could buy a premium theme and install it in your WordPress. However, I recommend starting for free.
➡ Customise your blog
Now that your theme is displayed on your blog, let’s do some designing issues and add our touch.
- Go to Appearance
- Click on Customise to bring out the customizer.
Here, you can do a lot of changes like uploading a logo, changing the layout and more.
Start by uploading your logo. Don’t have a logo? Go to Canva, a free designing platform where you can design everything including your logo, images, banners and more. Sign up in Canva, you’ll need it a lot when publishing content.
?Click here to Get a FREE Access to Canva?
- In the customizer, go to Site Identity, then choose to select a logo.
Just click “Select a logo ” to see the media upload tool. Here, you just have to drag and drop your logo or image.
At this step, you have many options. You can keep your blog name and tagline to have just the logo displayed in the header or you can keep them all. This is up to you.
You can also upload your favicon(the title icon beside your website’s name in the tap).
There are a lot of customization options here in the customizer.
After adding your logo, you can change everything you want to get an elegant design that fits your style.
Feel free to try all the options. You’ll learn while experiencing. Keep trying till you’re satisfied with the new look of your blog.
Here are some of the options provided in the customizer:
Colours – Here, you can choose another colour for your blog.
Header – Here, you can add an image instead of your logo. This part differs depending on the chosen theme.
Menus – This is an important part as you l set up the menu of your blog.
Widgets – Widgets in your blog are crucial as they add much functionality.
Layout – There are no fixed rules for changing your layout, as there are various ways depending on the chosen theme.
And more – Again, there are more customization options depending on the chosen themes.
Step 7: Install useful plugins to finish your tasks easier
After finishing the customization and the design, you have to install the basic plugins for making it easier for you to manage the blog.
Notice that you can add or remove any plugin you want later on according to your needs, but now we will just add the most important ones:
Adding plugins to your blog is easy:
- Go to plugins.
- Select Add New
- Search for the plugins by name.
- Click on the install button next to the plugin you chose.
- Press Activate.
The same steps are followed for installing every plugin.
There are hundreds of free plugins for WordPress which you can use in your blog. However, here are the best plugins which I recommend installing on your new WordPress blog at this step:
Today, every WordPress comes with the Gutenberg editor installed, but it is not preferred by most bloggers as it is not very friendly. If you are one of these, you can install the classic editor and use it.
You may find it easier to add new posts.
You know how much SEO is important for the ranking of your blog. Therefore, you have to make sure that you’re applying all SEO practices. Yoast SEO helps you to optimise your content for SEO allows you to write better articles with a higher chance of ranking in Google. This, in turn, will help you receive more visitors to your blog.
No matter what anyone says, I highly recommend installing a blog backup plugin like UpdraftPlus right now.
Mistakes and errors happen with everyone, especially beginners, so you have to be prepared for any trouble and have your blog files secured. It is better to always be prepared, instead of waiting for trouble and crying about it.
Your blog’s loading speed is important for SEO. It affects your ranking on Google providing a better experience for your users. WP Super Cache optimises the speed of your blog. It makes your blog load faster.
I recommended installing it when we installed our Bluehost WordPress above. However, if you didn’t install it yet, install it as it will help you create a simple contact form without any coding. You need this contact form on your contact page.
I also recommended installing this plugin before with our Bluehost WordPress above, but if you didn’t, feel free to install it now. We will use it for adding Google Analytics to your blog easily.
For sure, Google Analytics is important to help you know about your blog’s visitors.
Step 8: Write blog posts and publish them
Now, your blog is ready for blogging. What a comfortable feeling.
There are two ways for blogging on your WordPress: posts and pages, and there are different kinds of content which can be added including articles, images, videos and more.
While blogging, keep in mind that you are not just adding sentences next to each other. You have to make sure that you are providing valuable information within your blog post. Helpful content will encourage your reader to read the whole article, like it, comment on it and even share it. This will give your blog more exposure and more visitors.
Usually, your blogging should be about writing new blog posts consistently like every day or twice a week, but you may also publish pages if needed.
Pages and posts are not the same, here is a brief explanation for each one:
➡️ Blog Pages: You write evergreen content on your blog pages like the About page, Terms and conditions page, etc… Such content doesn’t change a lot.
➡️ Blog Posts – Here, you write your articles about different subjects. They have your categories, tags, author, and published date, and can be shared. on social media, communities and more. Your blog posts are included in RSS feeds. We can say that your main blogging content is written as your blog posts.
Create Blog Pages
Before starting to write anything, you should create the main pages which are important for your blog. This includes:
- Homepage – Crafting this page depends on the type of your blog. You can show your latest posts, showcase some results for case studies, talk about your goals or else.
- About – This page usually talks about the authors as well as the goal and vision of the blog. You can share some personal info about yourself, life experiences, skills and how you started.
- Privacy policy – This page is crucial for every blog. Every blog online must have a privacy policy page, especially those which will run ads and affiliate links and banners. There are many privacy policy generators which you can use for creating a Privacy Policy page for free.
- Terms and Conditions – Generally, it is set the same as the privacy page. In case of offering a certain product, you may add some additional terms on this page.
- Services – If you wanna offer certain services to your readers, you can add a Services page to promote them on it.
- Contact – Here you will have a nice contact form to help your readers contact you if they have something to say. You’ll just put the shortcode of your wp form.
How to add new pages in WordPress?
To add new pages in WordPress:
- Go to your blog’s dashboard.
- Open the left side menu.
- Hover your mouse over the Pages tab
- Click on Add New.
- Start editing your new page and publish it.
Writing Blog Posts
Done from creating blog pages? Now, it is time to start writing some blog posts and publish them on your blog.
This is what will get the visitors to your blog.
I know it is hard to start writing from scratch, but don’t worry. We all started from zero. It is better to publish blog posts everyday till you get approximately 30 articles, then you can take some rest and publish 2-3 times a week.
I won’t go into details about writing blog posts, but here are some helpful tips to help you write valuable blog posts that will help get loyal readers over time. :
- Be specific: Make sure that you choose a specific topic with the main keyword, and write a blog post about this topic without going outside the subject.
- Give examples: People understand your idea better when you give them examples, so try to include some examples in your article. Telling a personal story as an example would be great.
- Create useful content – Your blog post should be valuable and helpful. Keep in mind that your reader must learn something after reading your blog post.
- Unique content only – Please don’t copy other content and paste it into your blog. Google hates this, readers hate this, other bloggers hate this and you’ll regret doing this later as Google will punish your blog.
- Add images – Reading blocks of writing is boring, so you should add some images, infographics, screenshots and more to make your content alive. However, your media should be related to. your topic. I use Canva to create such images as it has a lot of templates where you can edit the images and texts to meet your topic.
- Do basic SEO – When you finish writing your blog post, you must focus on readability and SEO. Make sure that your blog is easy to read. read and follow the basic SEO practices. Don’t worry, I’ll explain this point in detail below.
Here’s how to add new posts in WordPress:
To add new blog posts in WordPress:
- Go to your blog’s dashboard.
- Open the left side menu.
- Hover your mouse over the Posts tab.
- Click on “Add New”.
- You’ll be taken to the post editor to add new posts and then publish them.
Would you like more explanation about writing a new blog post?
When you click on Add New, you will find yourself here in this editor where you can write a new post.
Start adding your blog post following these steps:
- Start by adding a title for your blog at the top of your page.
- Add the rest of the content under your title.
- Click on the plus button to add new elements like images, lists, quotes, and many other options.
- Click on the publish button when you finish writing and setting up the other elements in your blog post.
Congrats. Your blog post is live and can be viewed by others.
If you want, you can create some categories related to your niche. The categories will allow you to divide your blog posts into groups.
Step 9: Optimise your blog posts for SEO
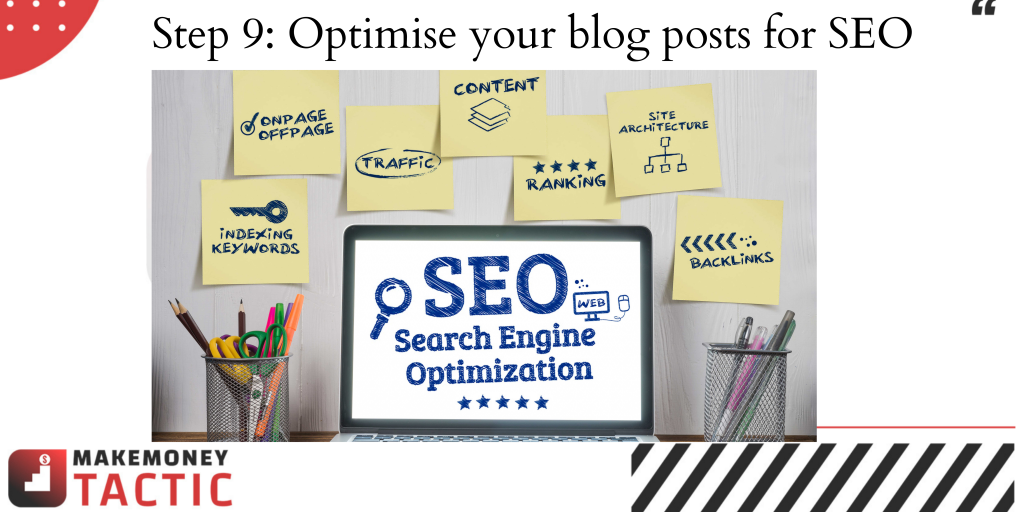
When writing a blog post, you have to keep in mind two important things:
1- Valuable and helpful for your readers – If your blog is valuable and helpful to your reading, it will get good traffic, likes, comments and shares.
2- Optimised for SEO – Besides being valuable and helpful, your blog post should be search engine optimised. This means that you have to apply SEO practices to your blog post. This is the right way to get traffic from search engines like Google and Bing. Traffic is the people who come to your blog and read your posts.
Search engine optimization (SEO) is the process that bloggers or webmasters do for getting traffic from search engines like Google, Bing, Yandex and Yahoo. This is a free traffic
Like most bloggers, most of your free traffic will come from SEO traffic if you optimise your content in the right way.
This is not hard. You just have to do the basic search engine optimization for your blog posts to get a higher chance of ranking in the first pages in Google.
SEO basics for a higher ranking
Below, I will share with you some SEO basics to optimise your blog for SEO:
1- Include the main keyword in your blog’s title and distribute it among the article
Before writing a post, we do keyword research to choose the best keywords for our article.
There are many free and paid tools to find keywords for your blog posts. I use H-supertools which is a free research keyword tool to find keywords.
Let’s say you want to write a blog about how to make a salad, your topic would be “make a salad”. Go to the keyword research tool and write “make a salad”, you will find a lot of keywords. Choose the one that meets your content more.
Make sure, as a beginner, to choose a keyword of low difficulty and good search volume.
If you have a good budget, you can use Semrush. It is one of the most popular SEO tools in the market.
In addition to getting the best keywords for your blog, it feels as if you are sitting in front of your competitor’s desktop watching his analytics. This is GREAT.
??Click Here to Get a fast Access to SEMRUSH.
Now, after getting your keywords from any keyword research tool you chose, you have to use this keyword in these places inside your article:
- Meta title
- Meta description
- H1 heading
- At least two H2 headings, or half the number of your headings if it is a big blog post. If you have 10 headings(h2, h3, h4, etc…), use it in 5 of them
- Naturally in the body as much as you want but don’t overdo it.
- The first 100 words of the introduction
- Image file names and alt text of your blog post.
Optimise your SERP appearance
As said before, we must include the main keyword in your meta description and meta title of your blog post, but this is not enough. There are also other practices you should apply to your Meta to optimise them and enhance their appeal on the SERP. This can highly boost your organic clicks. These practices include:
- Meta description: Write a description between 155-165 characters. Make sure that it tells the reader the main idea of your post.
- Meta title: Write a title of 60 characters or less. Include the keyword in an attractive way to grab your readers’ attention.
Link internally
Internal linking is very important. Add to your new blog post at least 1-3 links to previous blogs on your site. This will help you a lot by:
- Keeping visitors on your site for a longer time.
- Let the visitors view more pages on your site.
- Provide more value to your visitors.
This will result in a better user experience which is very important for your ranking.
Improve your page speed
What would you like if you waited more than 30 seconds for a site to load? Would you leave it? Actually, I would. Speed is very important for keeping visitors, SEO and user experience. Therefore, make sure to maintain the best speed possible for your site.
Optimise your website as much as possible. Optimise the size. of your images, the structure of your page, the functionality of your plugins and more.
Shortly, the faster your site loads, the better results you get.
To know how your site works. is performing, check Google’s PageSpeed Insights tool.
Make your site responsive
Recent statistics showed that more than 70% of users use their mobile and not desktop. Therefore, you have to make sure that your site is responsive to mobiles. Making your website accessible and viewable on phones, tablets, etc… is vital.
Implement Schema markup
To make things clear, implementing Schema markup will not increase your traffic. However, it helps your search engine bots to find your pages and index them easily.
Regularly refresh your content
They say Old is Gold, but we have to refresh it to regain its luster. After all, I see that content freshness is an effective ranking factor for your website.
Even if your blog post is ranking number one on Google, you can refresh it for even better results.
However, Google is not stupid, so you can’t change a few words and publish it and then expect any good results.
Refreshing your content requires at least adding. new information, facts, statistics, images, links for new resources, tweaking your meta, etc…
Get backlinks
No doubt that backlinks are very effective for ranking on Google. Actually, I see it as one of the top Google ranking factors. Of course, we are talking about good quality backlinks to your website.
The rule is clear. The more quality backlinks you get for your site, the more authority your domain gets. Then, the more authority your domain gets, the higher organic traffic you get.
Therefore, website owners and bloggers do their best to get a lot of backlinks. Here are some strategies that work great for building backlinks:
- Contact other credible sites of your same niche and ask to write a guest post that includes a backlink for your site.
- Go to trusted forums and communities and write valuable content then include your links.
- Create original content of high-quality (like detailed tutorials and guides) that people would like to link to in their content.
Step 10: Promoting your blog to get traffic
If you think that blogging is only about creating a blog and writing posts, then you are wrong as this is only part of the story. The second part is to promote your blog and get visitors. These visitors are the audience whom you are writing for.
The key to getting thousands of visitors to your blog every month is “Promoting your content”. Having a big audience is the only way to make money blogging from your ads and affiliate links and banners.
As mentioned above, we optimise our blog with SEO practices to get organic traffic from search engines, but this is not always enough. It is better to try more methods to drive more traffic to your website.
How to get traffic to your blog?
There are many ways to get traffic to your blog, and here are some of them:
1. Share your content on Social media
Every time you publish a new post, share it on social media platforms like Facebook, Instagram, Twitter, Pinterest and more!
Make sure to post an attractive caption and image that grabs the reader’s attention and encourage them to read your blog post.
Catchy titles are crucial, so invest some time in creating them, and use a good platform for images. I use Canva, they have thousands of templates which you can edit as you like.
2. Write on Medium and Steemit
Some platforms with high credibility and millions of visitors allow you to write content and include links to your blog. Medium and Steemit are some of them.
Write some valuable content on Medium and include some affiliate links.
3. Guest Blogging
One of the best ways for getting a lot of traffic to your website is by guest posting on other blogs. Guest posts in other blogs of the same niche as yours can drive massive traffic to your blog in two ways:
- From the link itself in the other blog.
- From the search engines as guest posts increase the DA which boosts the ranking.
4. Build an email list
As soon as you start your blog, you should start creating an email list. People who visit your website and subscribe to your email list will be loyal readers interested in your blog.
Whenever you publish new posts, you send them emails to visit your blog and read your content.
Many tools allow you to build email lists with up to 1,000 monthly subscribers for FREE!
5- Engage in Quora and Reddit
Quora and Reddit get millions of visitors every month. They have an intellectual audience who visit these 2 platforms to ask questions and get knowledge about serious topics. If your blog provides real value, you can create a space or subreddit, share your content on the platforms, answer questions and more to get traffic for FREE!
How to make money from blogging?
Do you know that people make over 1k $ from blogging? That’s right. If you create a good blog that offers valuable, unique content, you will get traffic in a short time.
Only then, you can make money from your blog in a variety of ways like:
- Displaying ads
- Adding affiliate links and banners
- Promoting digital products
- Selling your own products
- Freelancing
Learn more about the ways mentioned above in this Make Money From Blogging guide.
